Hello! This guide is the best way to get the most of your Trial with Planleave!
If you made the decision to explore a PTO Tracker then you might as well see it, or use it as you would with your own organization.
Just know you can always schedule a 20-minute session with us which has a lot of advantages 1) You can ask any questions 2) See our demo database which is populated at 30+ employees and leverages the tools you will use 3) See things you may miss during your trial, and did not know you could do. If this is of interest, please schedule here Schedule Time with Planleave
Here is your Self Help Guide!
Add some co-workers, or simply use an alternate email. This is important so you can see the process flow and added administrative functionality.
1. Go to Organization-> Add Someone
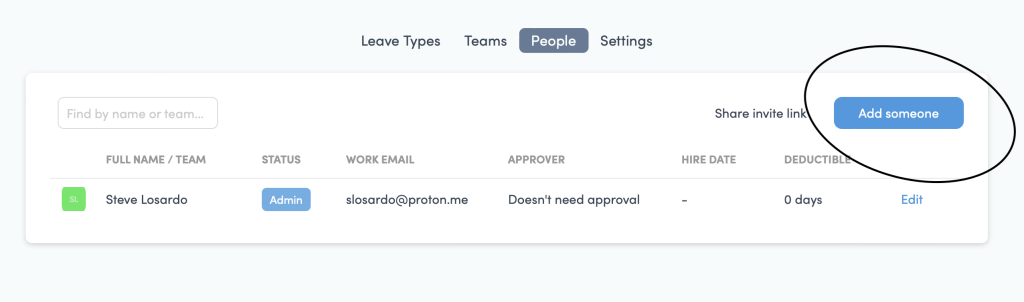
If you want to add multiple users, you can use the invite link in the same area Organization->Share Invite Link
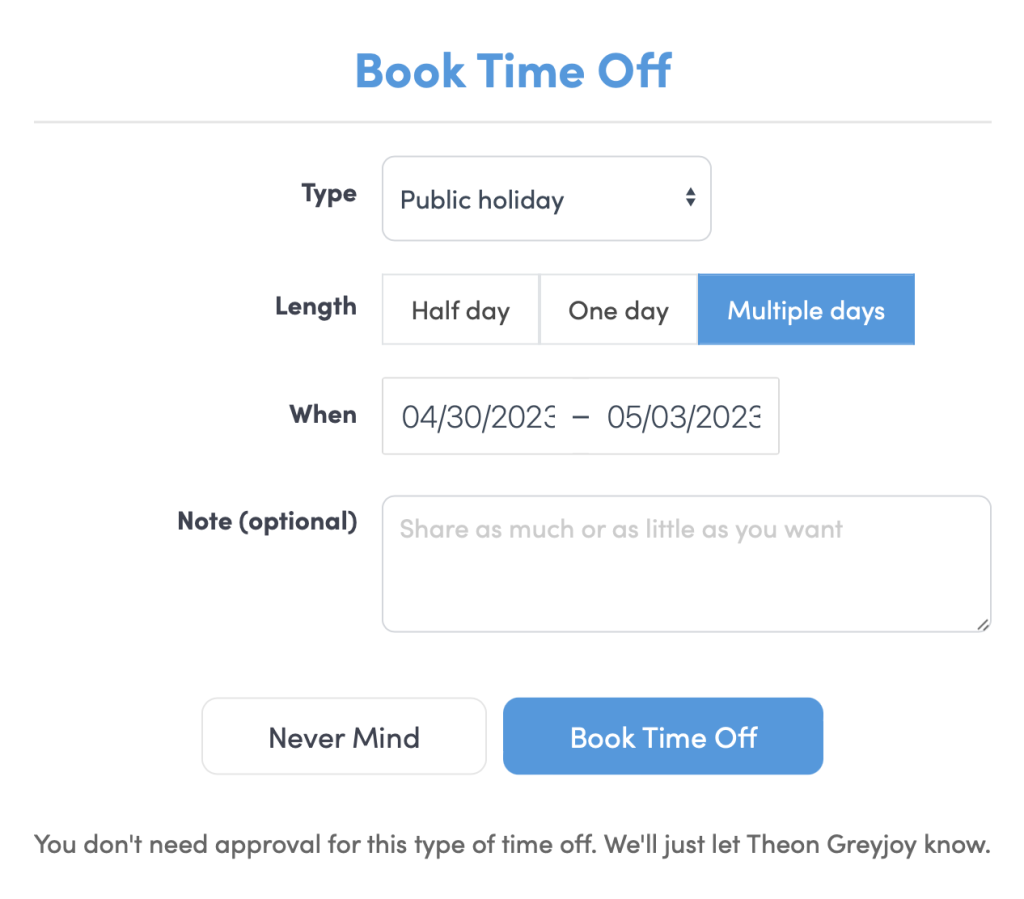
2. Book Some Time Off
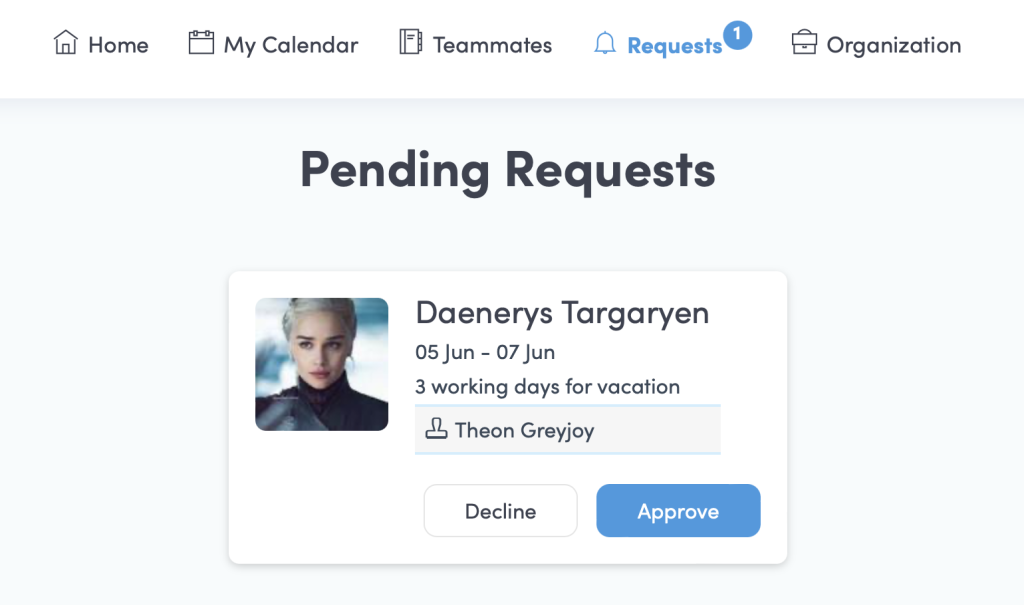
Either they or you can book some time off. This will send an email to the approver, and you are off and running with Planleave!. You can either approve or decline that request from your email inbox, or it will also be on your dashboard and under Pending Requests. You can do this under My Calendar->Request some Time Off Here
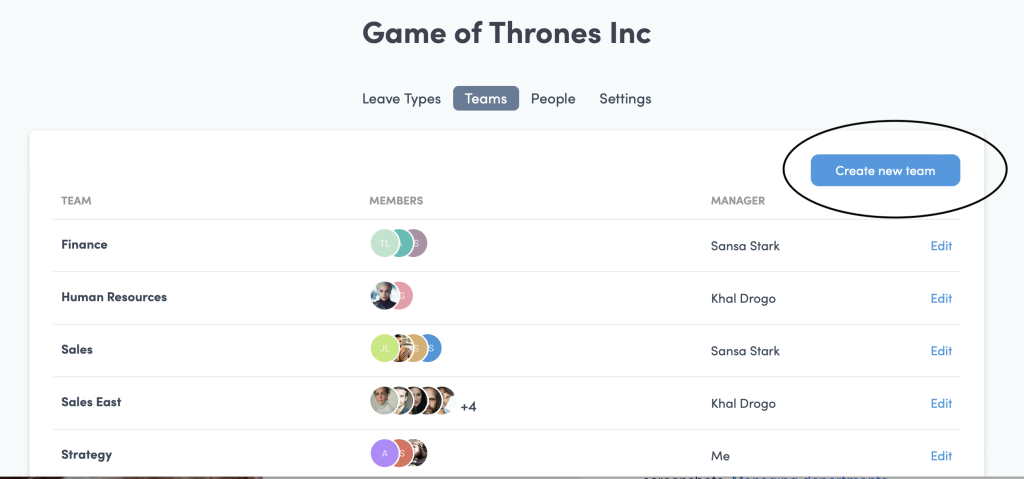
3. Build out your Teams
This is where you build your Organization. Set up departments that align with your company structure, and set up the managers who will approve time off for those departments
We do this under Organization->Teams->Create New Team
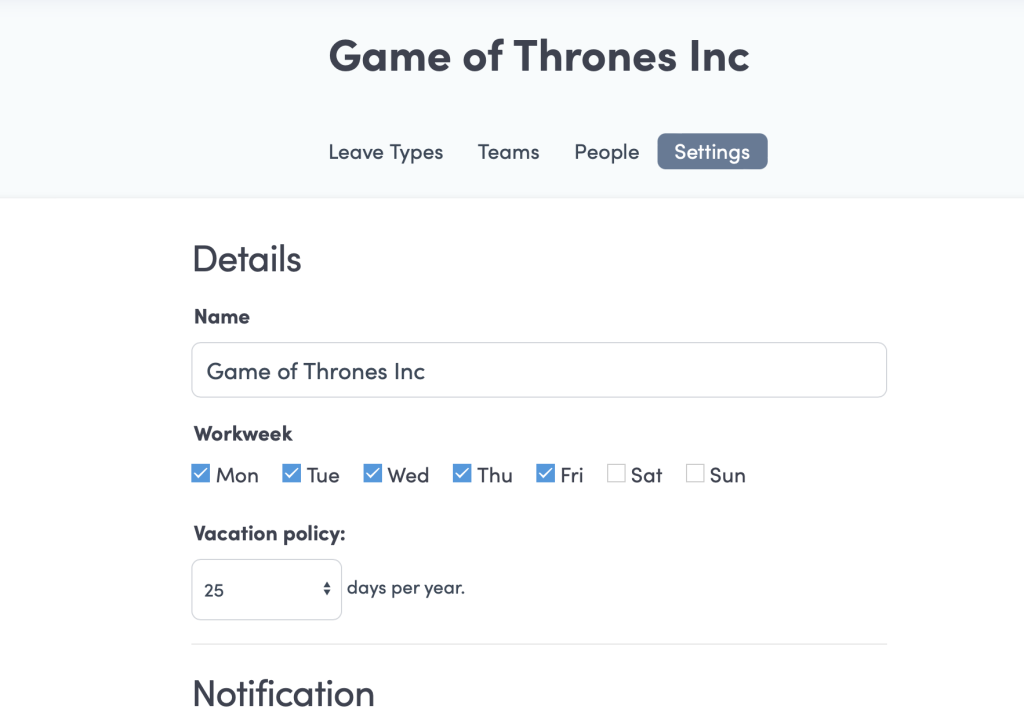
4. Go to Organization -> Policies
You will see your default policy originally created when you started your Planleave account. Then click on Create New Policy
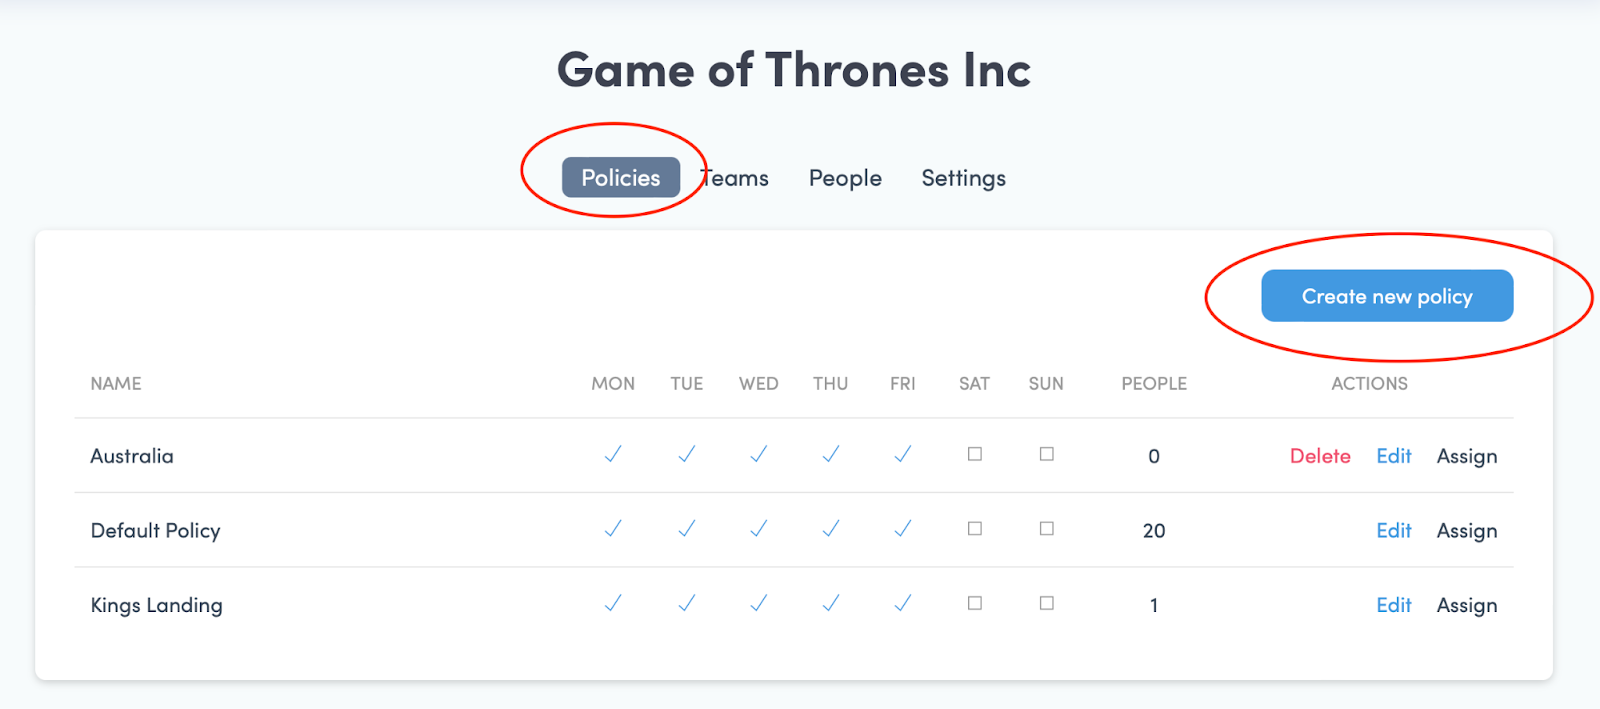
Under Create New Policy name your Policy and hit Create Policy
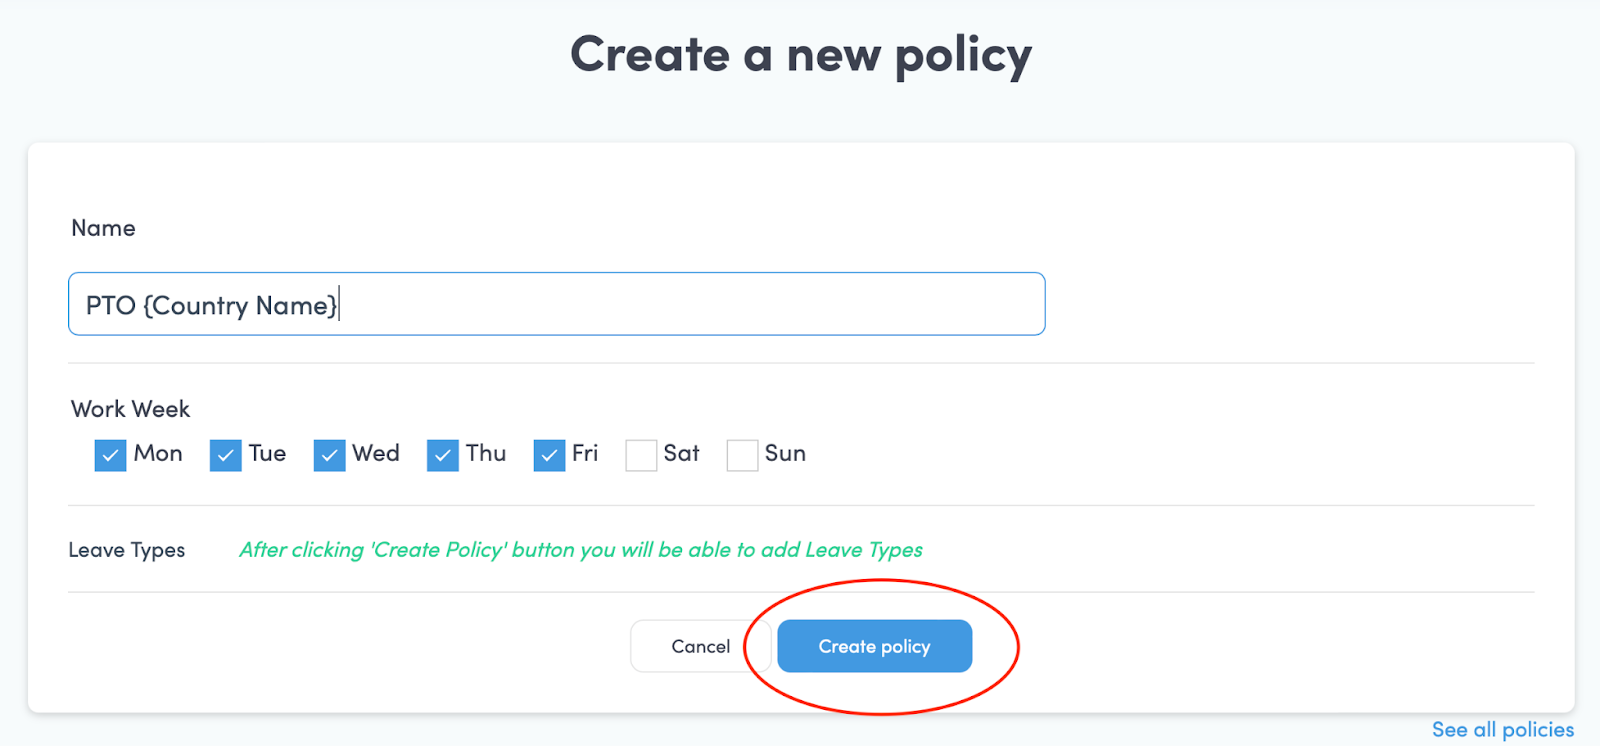
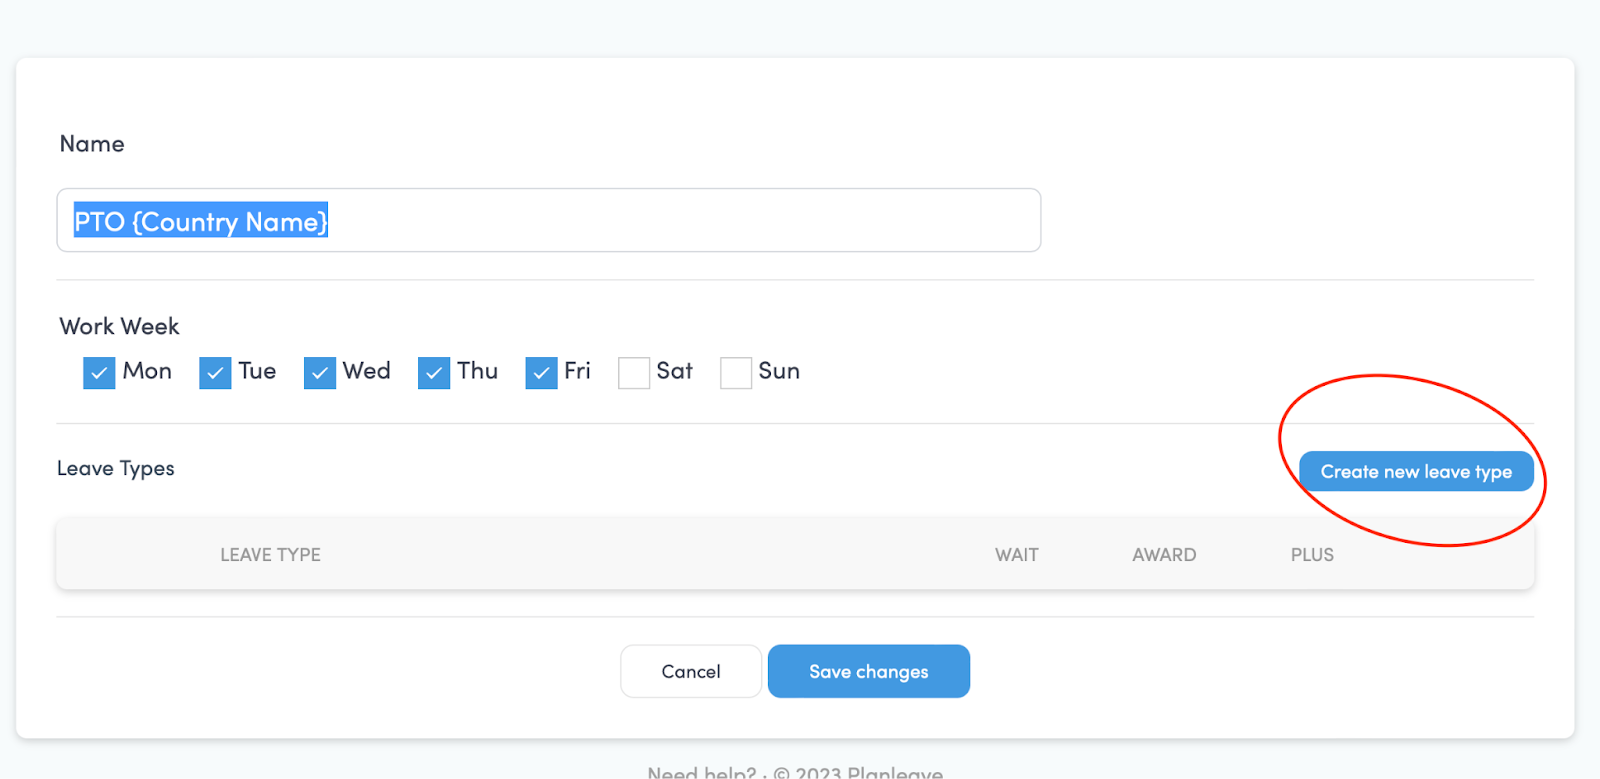
Then on the next screen Name this policy and save your changes
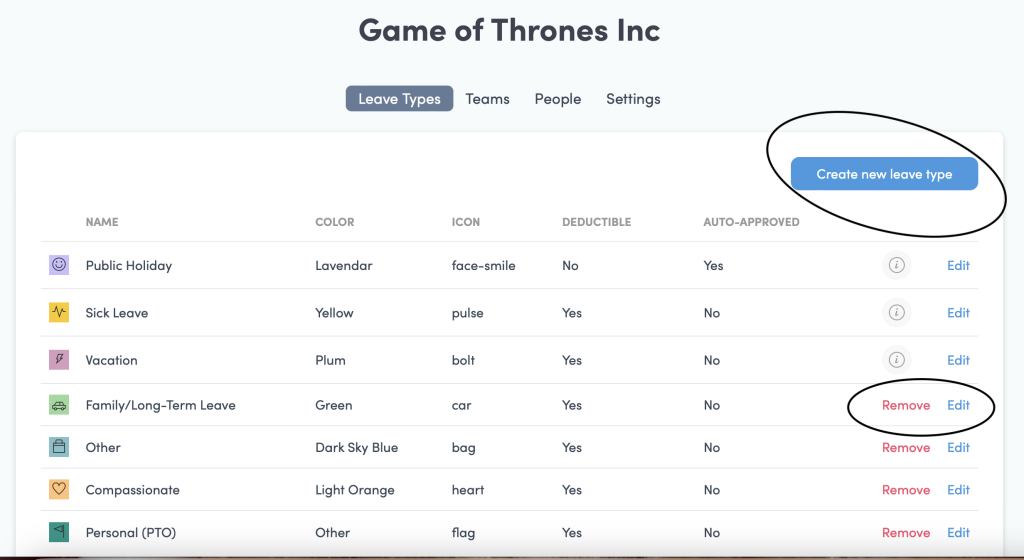
Then Click on Create New Leave Type
Here you have your parameters to set up your new policy. You can have them wait a certain amount of months, and then how many days they get after that time period and then for every next year how many more days.
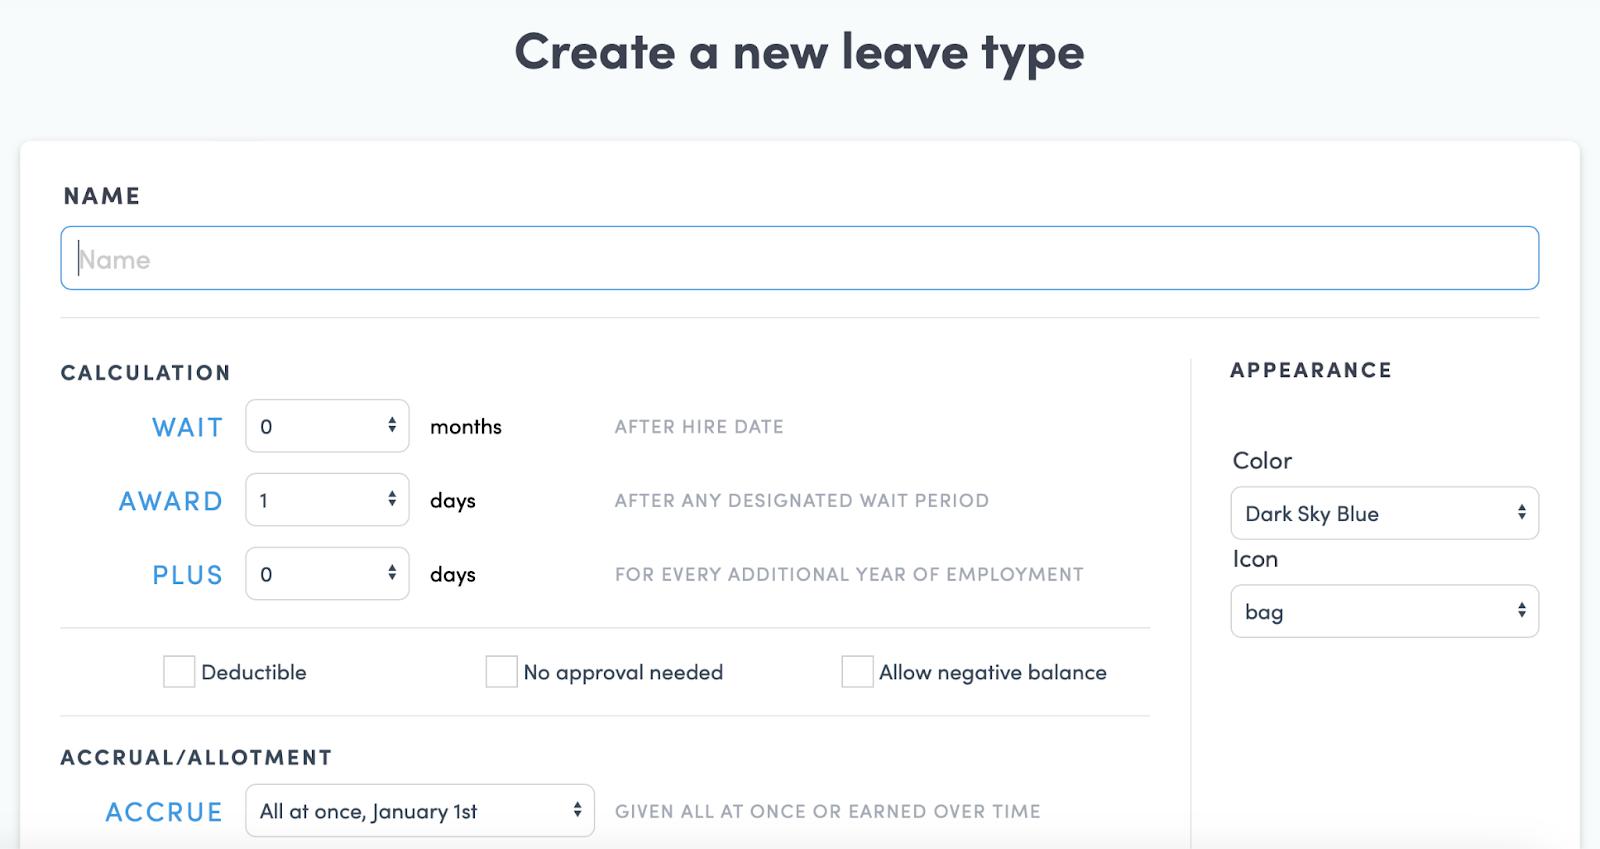
5. Customize Leave Types
Leave Types are intended to be flexible to your organization or even your Country Laws. We allow you to delete ours, edit them, and add your own.
Do this under Organization->Leave Types->Edit/Remove or Create New Leave Type
You now have your new Leave Policy and you can assign people to this policy. To do this, you will leave this area and go to People back on top under Organization
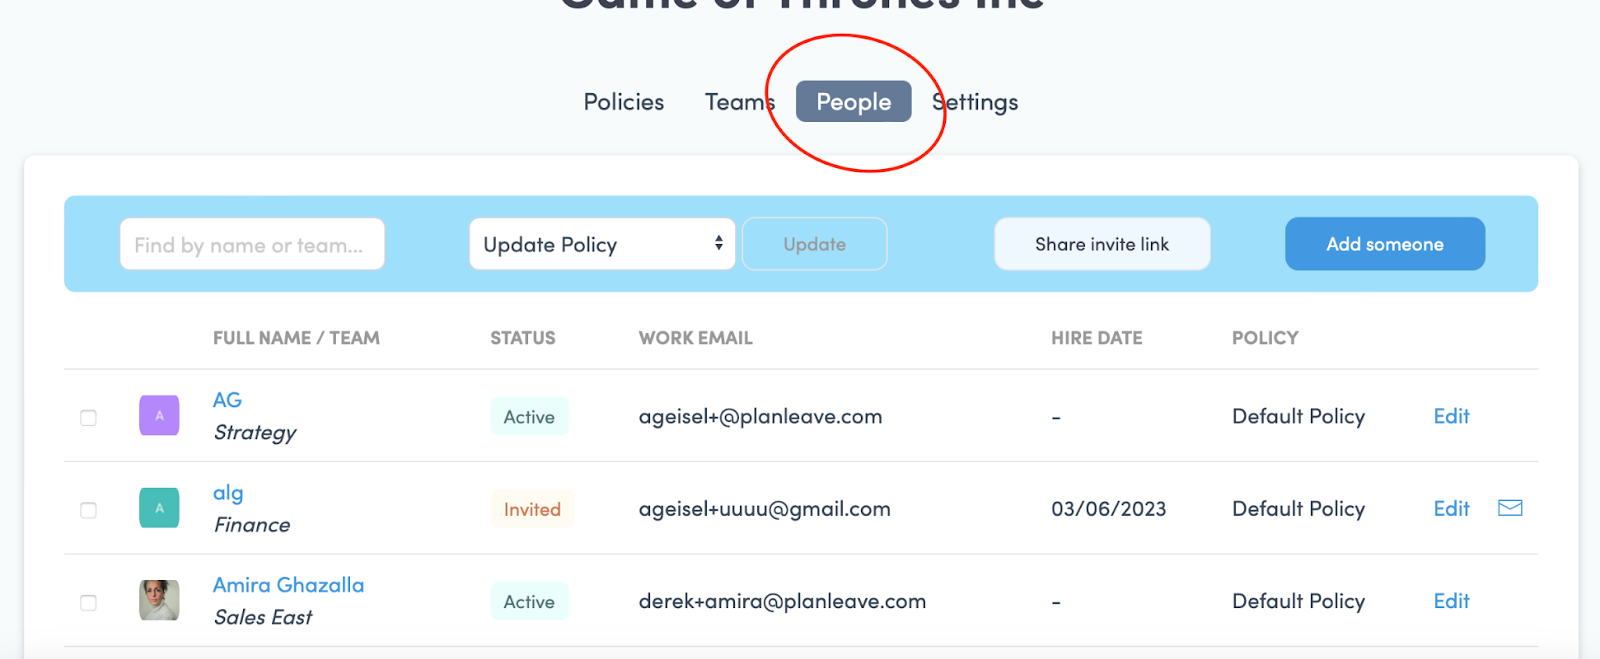
Click on any person you want in this new policy. You will need to do each employee individually until we create a mass add for multiple employees.
Once a person has been selected then click on Edit
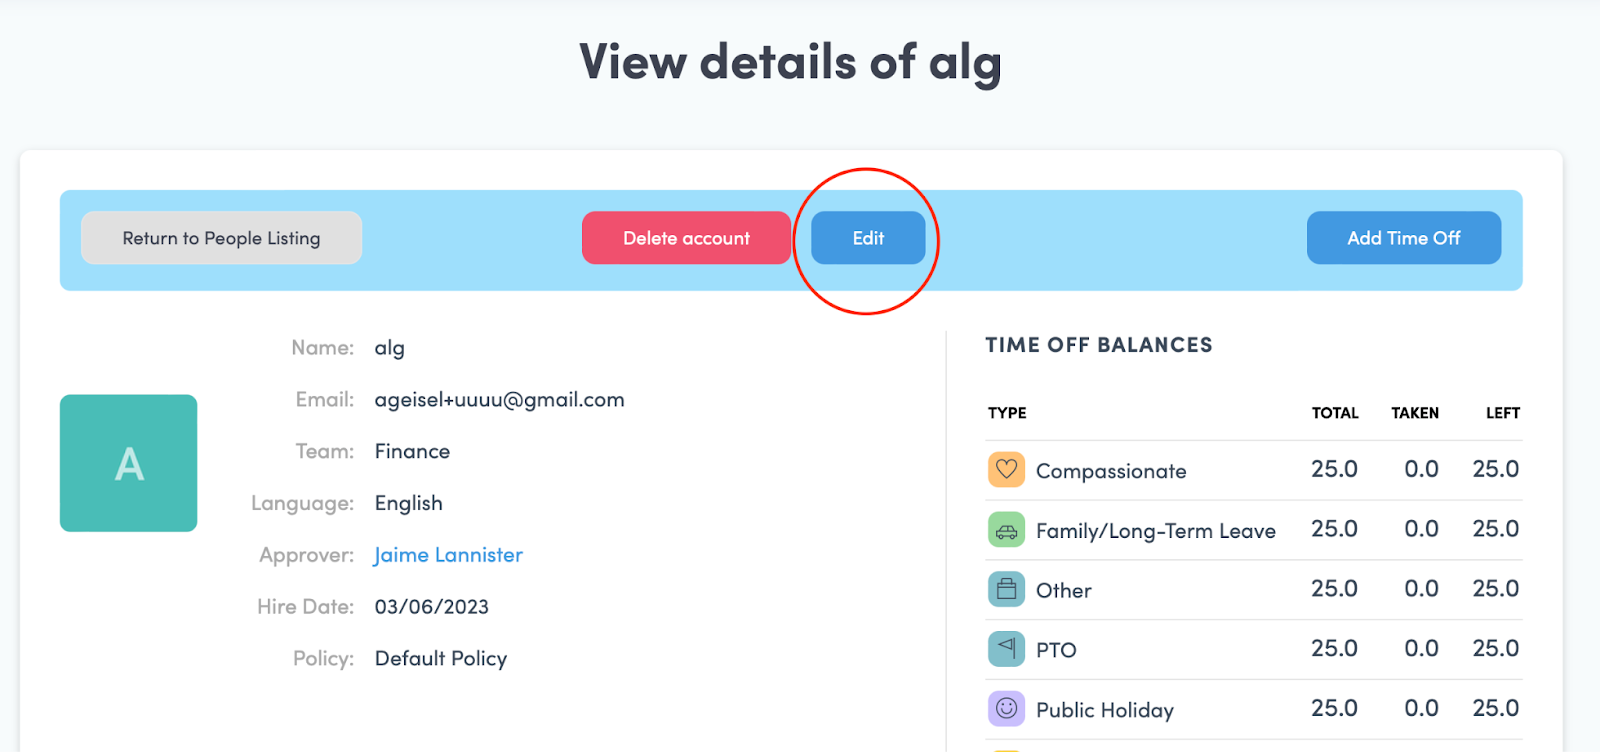
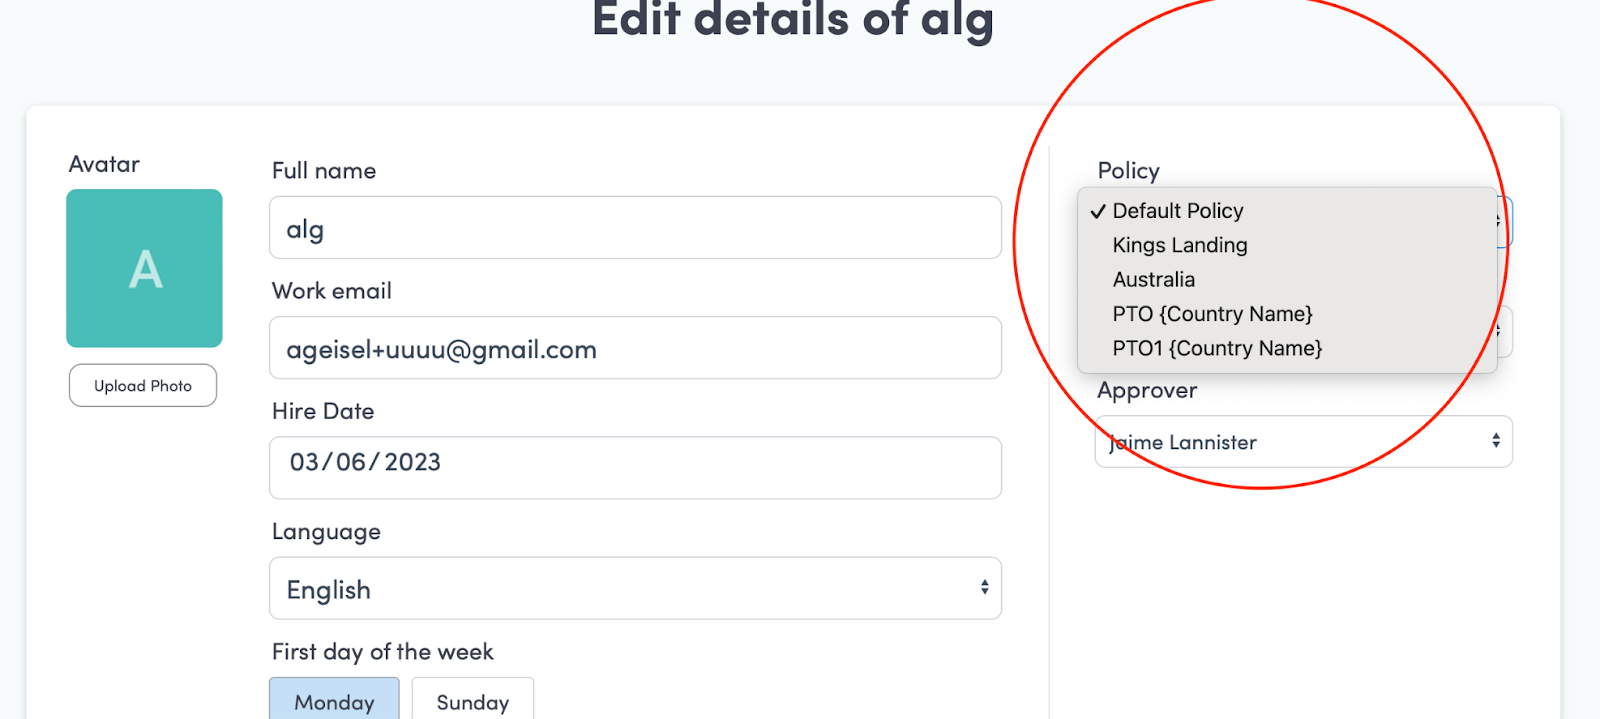
Once in Edit you will now see on the right your Policies and you can add this person to them
6. Advanced Settings
We have other useful features like giving others administrative access which is a good idea due to your administrator will take time off also. This allows you to set time off for others, approve requests, reporting + other features the user does not have access to.
Do this in both Organization->Settings
And there is a Setting Gear near your avatar in the upper right-hand corner
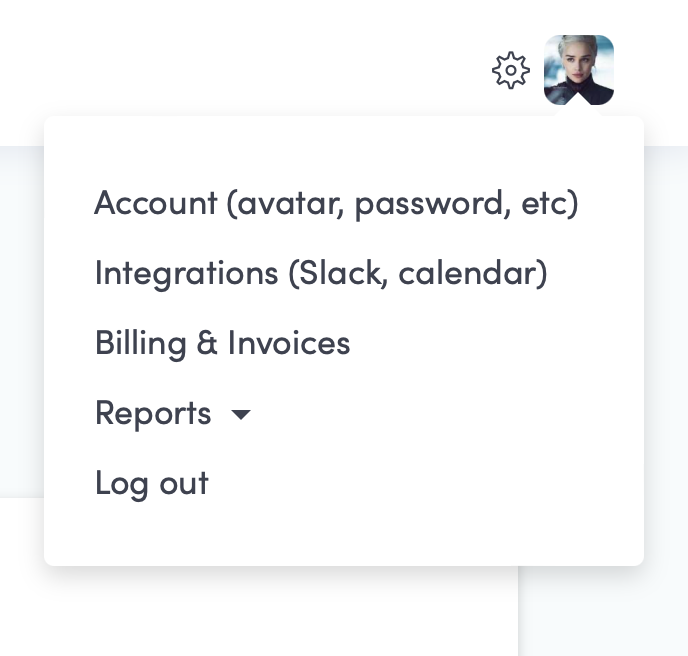
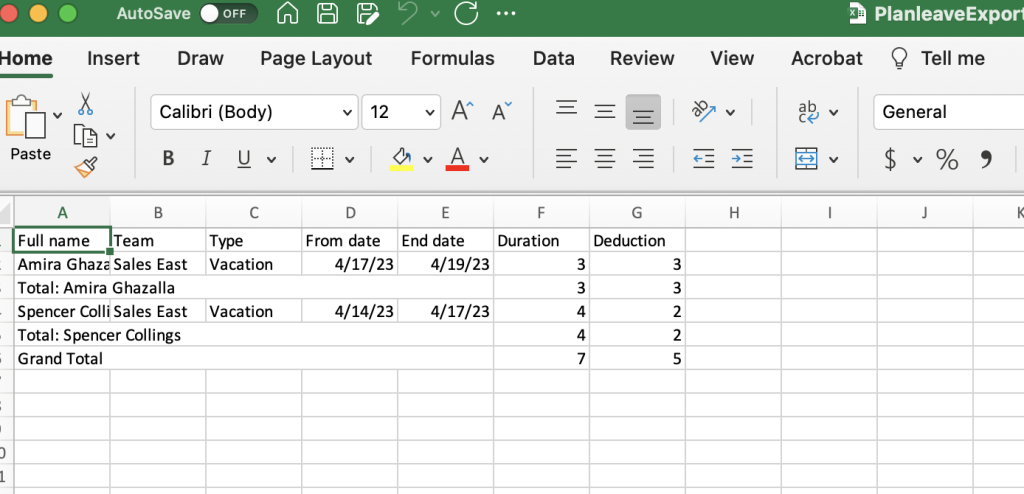
7. Run a Report
We use excel because you use excel. Got to the Settings Gear->Reports->Run Report. Then you have options to run by week, Month or Year and use excel like you normally do. You can convert to Google Sheets, email the report etc
This is a great start to get going on the basics of Planleave!
Other things you can do is:
Integrate your Slack, Google or Outlook Calendars https://planleave.com/blog/documentation_category/integrations/